Pollen and Propolis: What You Need to Harvest Them and When It Pays
Pollen and propolis are the two hive products almost everyone could harvest and few actually do. Traps and mats, how much you can take without harming the colony, cold or drying, realistic yields, storage and what the rules say about processing and labelling.
Sooner or later the question comes up. You have the hives, you have learned to make honey, and someone asks whether you also sell pollen. Or you lift the crown board, find it glued down by a dark, resinous substance, and it feels like a waste to scrape it into the bin.
Pollen and propolis are the two hive products that almost every beekeeper could harvest and that very few actually do.
The reason is not technical difficulty: the equipment is cheap and you learn the job in one season. The reason is that these two products demand presence. You do not harvest them and then forget about them the way you do with a super: they force you back to the apiary every day or two, and they force you to deal with cold storage straight away.
This guide covers what you really need in order to harvest them, how to do it without ruining either the product or the colony, and above all when it is worth doing. Because the honest answer is not always yes.
First question: can the colony afford it?
The pollen that ends up in the trap drawer is pollen that never reaches the brood nest. That is not a bookkeeping detail: pollen is the protein source nurse bees use to raise brood, and an adult colony consumes between 20 and 40 kilos a year for itself alone.
So traps go on strong colonies, not on the ones that are struggling.
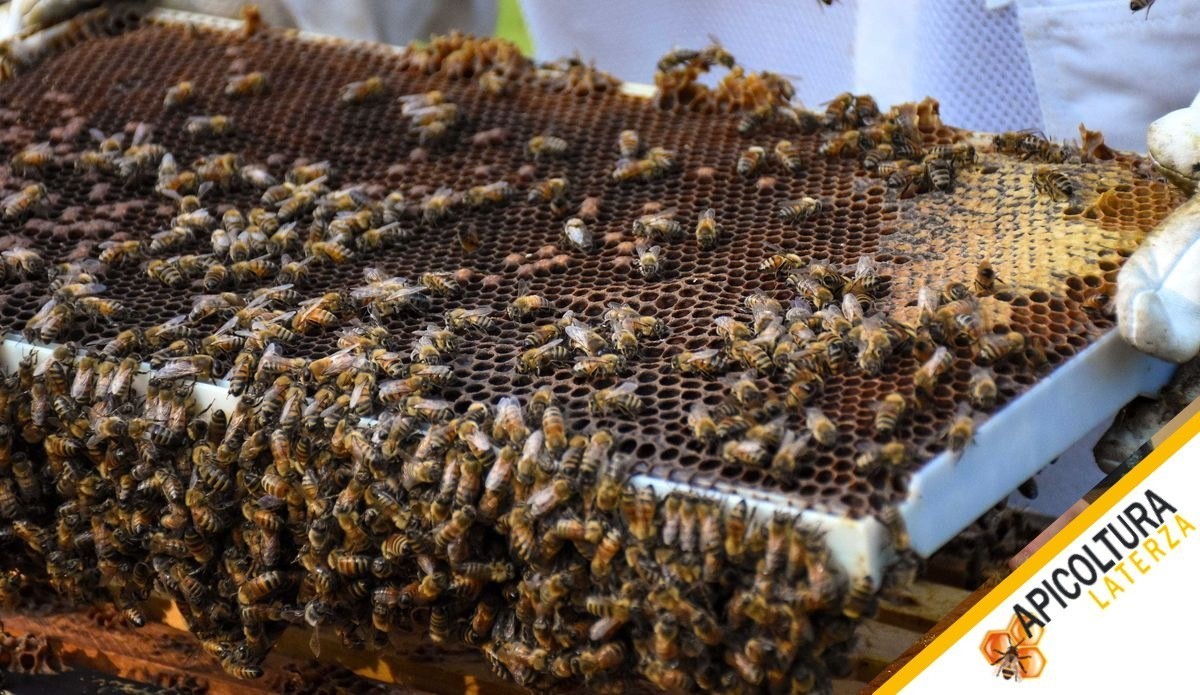
The practical benchmark: at least six frames of brood, visible pollen stores in the side frames next to the outermost brood, drones present at all stages. If the colony is halfway through a difficult build-up, or you have just split it, leave it alone and try again in three weeks.
The opposite also holds. A very strong colony in full flow brings in far more pollen than it can use, and part of it ends up stored in frames that will later block the nest. In that case the trap takes nothing away: it relieves pressure.
The pollen trap: how it works
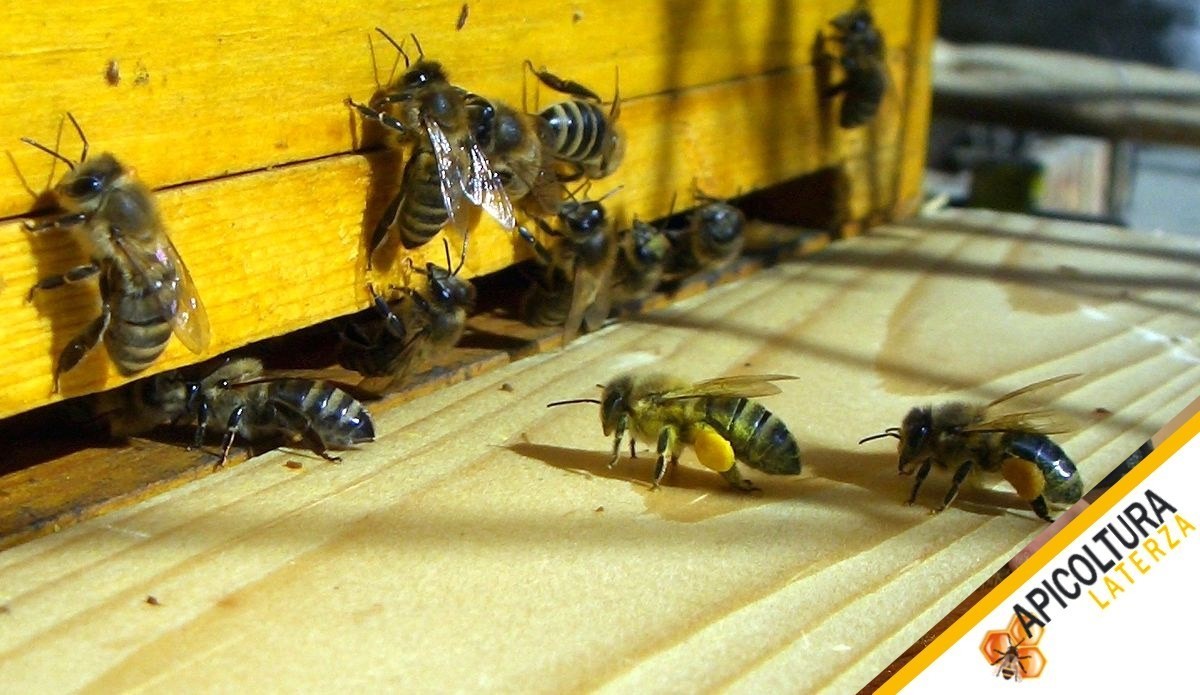
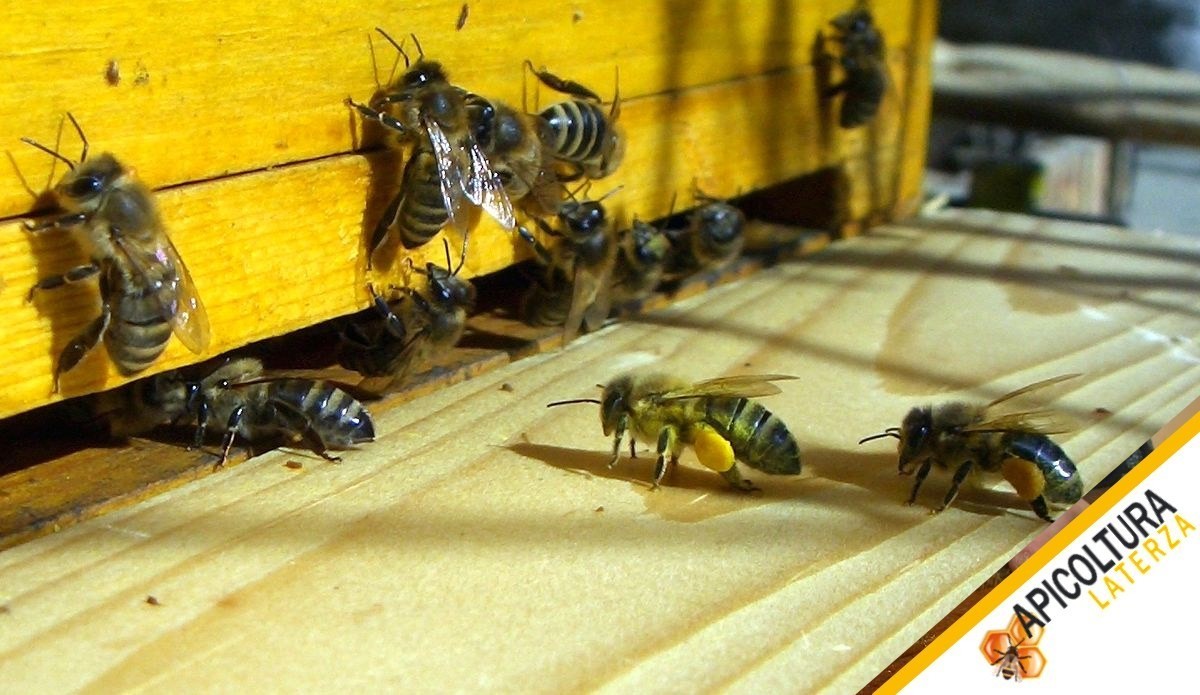
The principle is simple. Returning foragers have to pass through a perforated grid, and the holes are sized so the bee gets through but the two pellets on her hind legs do not. The pellets are knocked off and fall into a drawer below, protected by a fine mesh that stops the bees recovering them.
Commercial grids have holes around 5 millimetres, in perforated stainless steel or food-grade plastic.
One detail the catalogues do not explain: a trap must always leave an alternative passage for drones and for bees coming home loaded with nectar, otherwise the entrance jams and the colony gets confused. Well-made traps already have it.
If you are working out what to buy and in what order as your apiary grows, this is one of those small purchases to weigh up alongside the rest rather than on impulse: I covered it in the guide to equipment for a growing apiary.
Front-mounted or bottom-mounted: what changes in the product
Front traps fit onto the entrance. They are the easiest to check, they come off and go back on in ten seconds, and they give cleaner pollen, because the drawer sits well away from the hive floor.
Bottom traps work under the brood chamber. They yield a little more and they are less visible, but the drawer also collects whatever falls from the nest: wax fragments, dead bees, debris. That means more sieving work afterwards.
If you are producing pollen to sell, start with a front trap. If it is for your own use or to feed colonies back in spring, the difference in cleanliness matters less.
One rule that costs you dearly if you discover it on your own: traps must go on all at the same time across the hives in a row. Fit half of them and the foragers from trapped hives tend to drift into the untrapped ones, and you end up with unbalanced colonies.
How much you can take without doing damage
This is where a harvest and a mistake part company.
The classic criterion is to take no more than about 10 per cent of the incoming pollen, and never to leave the trap in place continuously. Seven to ten consecutive days is already the limit: beyond that the nest starts to feel the protein shortage and laying suffers.
The curious part, confirmed in the field by many, is that hives trapped part-time yield more than hives trapped continuously. The colony stays strong, keeps foraging hard and recovers quickly between cycles.
You work out how much you are removing by eye, at the entrance: count how many bees come home loaded in a minute and look at how many pellets end up in the drawer. You do not need laboratory precision, you need to avoid fooling yourself.
Realistic figures, so you do not start with the wrong expectations: a beekeeper working around twenty hives takes home something like twenty kilos of pollen in a season. It is not honey, and it never will be.
The drawer has to be emptied, always
This is the part that makes most people give up on pollen.
Freshly trapped pellets are damp. They sit a few centimetres off the ground, they pick up the night humidity, and moisture on pollen does not just mean lower quality: it means mould. Fresh pollen is an excellent substrate for fungi, and a mould bloom cannot be rescued. It gets thrown away.
So the drawer is emptied every day in hot or humid weather, and never later than two or three days otherwise. Evening is best, before the night damp settles. And after a storm you go and empty it immediately, even if it was not on the plan.
If you already know you cannot get to the apiary that week, do not fit the trap. It is the most sensible decision available.
From drawer to jar: cold or drying
Harvested pollen takes one of two routes, and they give two different products.
The cold route. Freeze it as soon as you get home, at minus 18 degrees, and keep it frozen until packing. It is the route that preserves the product best, but it commits you to a cold chain that has to hold all the way to the customer: it works if you sell at the farm gate or from a properly equipped market stall, not if you sell from a shelf.
The drying route. Dehumidify in a pollen dryer, taking moisture below roughly 8 per cent. The non-negotiable rule is temperature: stay under 40 degrees, ideally around 35 to 37. Above that you lose aromas and volatile compounds and the product drops a grade. Drying has to start within 24 hours of harvest.
Dried pollen keeps at room temperature and lasts for months. It has less aroma than fresh, but it is the format you can handle without freezers.
There is also a middle way many producers use: controlled dehumidification below 35 degrees down to around 10 per cent moisture, a reasonable compromise between shelf life and integrity.
One step worth knowing: after cleaning, many producers run a 48-hour blast at minus 18 degrees, which secures the product against possible pests before packing.
Cleaning: sieving and sorting
Pollen straight out of the drawer is not ready. It contains wax fragments, legs, dead bees, splinters of wood and the odd crushed pellet.
Cleaning happens in two steps: sieving that separates by size (by hand with screens, or with a fan-assisted sorter that blows the light material away) and visual sorting at the table, which is tedious but decides how the finished jar looks.
Everything that touches the pollen must be food-grade. Containers, sieves, trays, gloves.
Propolis: the mat makes the product, the scraper makes the waste
On to the second product, where doing it well and doing it badly differ even more sharply.
Almost everyone knows propolis as the sticky stuff you scrape off frames and crown boards at the end of the season. It is propolis, yes, but it is waste-grade propolis: mixed with wax, wood splinters, paint, rust and dirt. Scraping alone rarely goes beyond 40 to 50 grams a year per hive, often much less, and the quality is mediocre.
The serious method is different, and it costs a few euros.
You use a propolis mat: a food-grade plastic or silicone screen with a very fine mesh and slots a few millimetres wide. Bees will not tolerate gaps and draughts, so they seal them. What they deposit on the mat is clean propolis, with no wood and no paint.
With a mat you comfortably reach 100 to 300 grams per hive in a season, and more than that in the best conditions.
Where the mat goes and when bees gather resin
The mat lies flat on top of the frames, in place of the crown board, under the roof.
Two factors push the bees to work it: light and air. A mat left in complete darkness gets little propolis; let a little light through and give it a minimum of air movement, and the bees set about sealing every gap.
There are two good windows in the year: early spring and, above all, the stretch from late summer into autumn, when the colony is closing the nest down for winter. Above 18 degrees bees collect resin for most of the day; in cooler seasons they work the warm middle hours.
The mat stays on for weeks. There is no drawer to empty and nothing that spoils: compared with pollen, propolis is the easy-going product.
One habit that saves trouble: never collect propolis from the hive floor or the entrance. That is the dirtiest and least valuable material, and mixing it with mat propolis drags the whole batch down.
The freezer trick
Try to pull propolis off a mat at room temperature and you end up with sticky hands and a mess.
The trick is cold. Put the mat in the freezer for a few hours (a few minutes can be enough with a thin mat) and the propolis turns hard and brittle. Then you flex and twist the mat gently, or tap it over a container, and the pieces come away on their own.
The mat goes straight back on, season after season.
Storing propolis
Raw propolis keeps in food-grade bags inside cardboard boxes, without compressing it into a block.
The enemy is heat: above 10 to 12 degrees the pieces tend to agglomerate into a single mass that is then hard to work with and hard to weigh. A cool dark room, or the freezer, settles the matter.
Keep batches separated by year and by apiary. If somebody asks one day where it came from, you have to be able to say.
When it is actually worth it: counting the hours
Now the awkward question.
Pollen sells well and at an interesting price, but the real cost is not the trap: it is the daily trips to the apiary, the dryer or the freezer, and the hours of sorting. If your apiary is forty minutes away and you go on Saturdays, pollen is not for you. If it is behind the house or on your daily route, the arithmetic changes completely.
Propolis is the opposite: it costs almost nothing in time, the mat works on its own for weeks, and even with ten hives you build up a few kilos over a couple of seasons. The constraint is on the other side, at the point of sale: raw propolis is worth little per kilo, and the value sits in processing, which is not something you improvise in a kitchen.
If I had to give one rule: start with propolis. It costs little, it does not force you to change your habits, and it tells you whether the market for hive products other than honey genuinely interests you. Add pollen later, once you have the logistics to handle it.
There is also a use for pollen that has nothing to do with selling and is badly underrated: freeze part of it to give back to your own colonies when protein is scarce, alongside feeding done at the right time. In years with a poor spring it makes a real difference to build-up.
Selling pollen and propolis: what the rules say
Read this part carefully, because it is where people go wrong most casually.
Harvesting pollen and raw propolis falls under primary production. A beekeeper already registered in the national beekeeping register has generally satisfied the notification requirement under European food hygiene law, and does not have to file a separate notification with the local health authority for this activity.
Things change once you process the product. Drying, cleaning, packing and labelling pollen are processing operations: they belong in premises meeting the requirements set for honey extraction rooms, with food-grade equipment. For propolis, turning it into extracts and preparations almost always goes through authorised laboratories, and the finished product often falls under food supplement rules, with further obligations.
Then there is the point about words.
Health claims may appear on a label or in advertising only if they have been authorised and entered in the EU register, under Regulation EC 1924/2006. There are no authorised health claims for pollen and propolis: the applications submitted fall in the group that remains on hold and unapproved. In practice, on your label and on your website you cannot say they are good for anything, you cannot attribute curative or preventive properties, and you cannot get around it with hints.
You can describe the product, its botanical origin, the area it comes from, the harvesting method. That is plenty, and it is more honest.
One note that always needs giving: pollen is a carrier of allergens, and should be recommended with caution to anyone sensitive to pollens.
Implementation varies from region to region in Italy. Before fitting out a room or printing a label, one phone call to your local veterinary service saves you months of trouble.
Three mistakes I see most often
One: the trap left on for the whole flow. You start out expecting to double the harvest and you end up with colonies slowing their laying and, in the end, less pollen too.
Two: the drawer emptied whenever it suits. Three days of humid heat and a week of work goes in the bucket. There is no rescuing mouldy pollen.
Three: scraped propolis sold as propolis. Wax, splinters and paint do not become a product because you call them one. A mat costs about as much as two pizzas and changes the product category.
I will add one that is not technical: harvesting without already knowing who you are selling to. Pollen in the freezer and propolis in a bag do not add value on their own, and after two years they become a storage problem.
In short
Pollen is trapped with a grid around 5 millimetres, on strong colonies, part-time and never beyond seven to ten consecutive days, taking about 10 per cent of what comes in. The drawer is emptied daily. Then either the freezer at minus 18 degrees or drying below 40 degrees down to under 8 per cent moisture, within 24 hours of harvest.
Propolis is collected on a fine mesh mat over the frames, released after a spell in the freezer and stored cool. It yields three to six times what scraping gives, with a product in another class altogether.
Both only make sense on colonies that are doing well. And it is worth remembering that pollen also has a botanical and territorial value: the flowering plants decide which pollen you harvest, as I described when writing about the importance of pollens in beekeeping. As with beeswax and with properly ripe honey, the quality of the finished product is decided in the apiary, not in the workshop.
And all of it rests on the same premise: populous, healthy, well-run colonies. If your apiary is not in a condition to give you an extra harvest, the first investment is not a trap. It is the bees.
Pollen and propolis only come from strong colonies
We raise nucs, queens and colonies in our own apiaries, with traceable origin and scheduled deliveries. If you want to bring your apiary to the point where it can give you a second and a third harvest, tell us how it stands today: we will tell you frankly where it makes sense to start.
In Same Category
- Urban Beekeeping: Rules, Siting and Good Neighbours for Keeping Bees in the City
- Wildflower, Monofloral or Honeydew: How to Tell Honeys Apart and Choose the Right One
- Swarming: Recognising the Signs and Managing It in Spring
- Planning Your Apiary for 2027: How Many Colonies and Which Bees
- How a Bee Colony Is Organised: Queen, Workers and Drones